• HOME
  • ABOUT
  • CONTACT US
  • DISCLAIMER
  • SITEMAP
  • PRIVACY
facebook twitter instagram pinterest bloglovin Email

FUN COOKING

Find Good and Natural Recipes

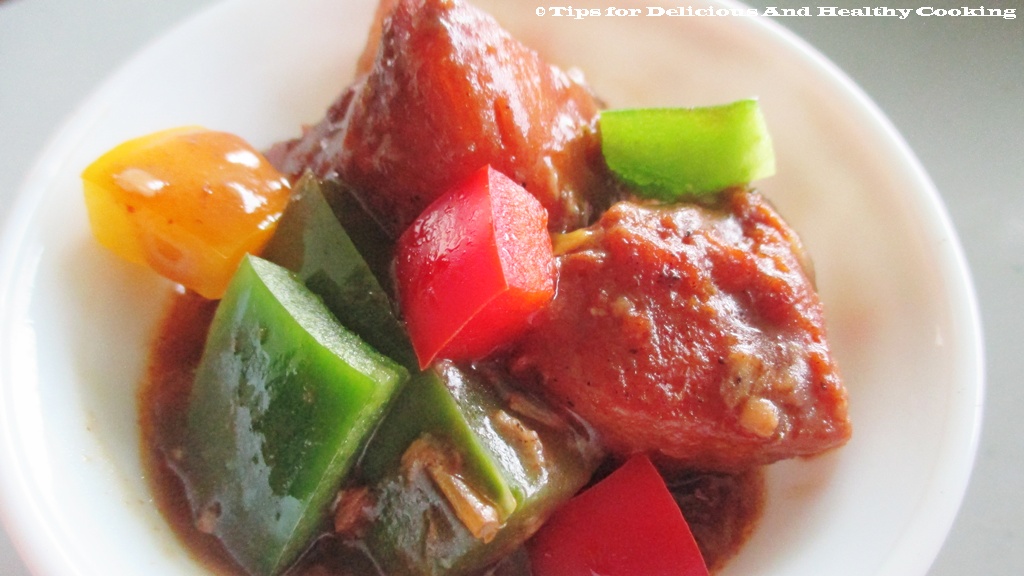
Fried Vegetables Potato Sauce

Potato Sauce with stir fried vegetable is a very quick to cook delicious recipe. Awesome accompaniment  with grilled chicken or fish. If you are in a hurry then just have it with bread toast. You can made it more healthy adding more veggies and prawn , fish pr chicken . I am sure you will love this smooth tasty flavored potato sauce. Enjoy.

Fried Vegetables Potato Sauce

Ingredients
  • 2 potato boiled and mashed
  • 1/2 cup baby corn sliced blanched
  • 1 yellow black pepper cubed
  • 1 tomato cubed
  • 1 tbsp garlic paste
  • 1 cup chicken stock
  • 1 1/2 tbsp butter
  • 1 tsp cream cheese
  • to taste salt and pepper
Cooking Directions
  1. Heat butter in a pan. Now add 1/2 tbsp garlic stir fry corn , pepper and tomato with little salt and pepper. Keep aside.
  2. In another pan heat rest of the butter. Add garlic paste. Fry till little brown. Then add mashed potato add salt and pepper. Mix well. Now add chicken stock. You can made the sauce thick and thin according to your choice. Add cream cheese. Mix well, then add the stir fried vegetables and mix well. Your dish is ready. This is the basic potato sauce you can ad more flavor adding oregano and basil and chopped parsley. You can also add stir fried prawn and chicken slices to this sauce or just roll it with pasta. This is truly delicious. Enjoy Potato sauce with stir fried vegetables.
Fried Vegetables Potato Sauce

Be Happy And Stay Healthy.
Share
Tweet
Pin
Share
No comments
Nutty Carrot Egg Wrap

Nutty carrot in egg wrap is a very delicious breakfast, I am sure you all will love it.Delicious cashew nut is packed with energy, antioxidants, minerals and vitamins that are essential for robust health. Cashew, or “caju” in Portuguese, is one of the popular ingredients in sweet as well savory dishes worldwide.They are rich in “heart-friendly” monounsaturated-fatty acids like oleic, and palmitoleic acids. These essential fatty acids help lower harmful LDL-cholesterol while increasing good HDL cholesterol.Cashew nuts are abundant source of essential minerals. Minerals, especially manganese, potassium, copper, iron, magnesium, zinc, and selenium are concentrated in these nuts.They are also good in many essential vitamins such as pantothenic acid (vitamin B5), pyridoxine (vitamin B-6), riboflavin, and thiamin (vitamin B-1).I this recipe I combine delicious nutri rich carrot with cashew and wrap all in protein rich eggs. It's not only delicious but healthy too. I am sure such healthy breakfast will definitely boost your energy in the morning andmake your day bright.So enjoy Nutty carrot in egg wrap.

Nutty Carrot Egg Wrap

Ingredients
  • 1 big carrot cut into thin strips
  • 2 tsp cashew powder
  • 3 garlic clove crushed
  • 2 tsp olive oil
  • 3 eggs
  • 1/2 tsp ginger juice
  • 1/2 tsp butter
  • to taste salt and pepper
Cooking Directions
  1. In a skillet heat olive oil. Add crushed garlic fry a little. Then add carrots, salt and pepper. Mix well fry in medium to high flame till the carrot is little soft.Add cashew powder.Mix well.Fry for a minutes then put off the flame and keep aside.
  2. Now in bowl whisk  three eggs with salt, pepper and ginger juice. Heat  another skillet brush butter and pour the eggs and make a thin sheet of open faced omelette. In a bowl take the thin sheet of open faced omelette place the fried carrot on it and then cover the top with the edges of omelet. Serve hot. You can have it simply the way it is or serve with a crisp loaf of butter toasted bread.
Nutty Carrot Egg Wrap

Be Happy And Stay Healthy.
Share
Tweet
Pin
Share
No comments
Butter Tossed Baby Onions With Fish

In a lazy winter night if you want a quick and delicious recipe then this butter tossed baby onions with fish can be in your fav list. It takes just 10 minutes to cook and it's super easy.Its also very healthy.Onions are classified as the veggies which make us cry, in addition they are the ones which help recover as well as safeguard the body when they’re injured or even sick. Onions consists of load of natural sulfur, vitamins, minerals, fiber, as well as antioxidants.Onion consists of the majority of the nutrition which are needed by the entire body. The water content in onion is nearly 80%. The nutrients present in onions are carbohydrates, proteins and fats. Minerals just like phosphorous, zinc and potassium can be found in onions too. Onion also includes calcium and also vitamins. So not only butter fried onion is tasty but it is also loaded with health benefits.

Butter Tossed Baby Onions With Fish

Ingredients
  • 15 baby onions peeled
  • 2 carrots chunks blanched
  • 1/2 cup shredded fish/ chicken
  • 4 whole garlic
  • 1 tbsp mustard sauce
  • 3 tbsp tomato ketchup
  • 1 tsp peanut butter
  • 1 tbsp butter / diet butter
  • to taste salt and pepper
Cooking Directions
  1. Heat butter in a pan add whole cloves of garlic then add the baby onion. Toss well.Now add carrot chunks and shredded fish ( you can use leftover cooked fish and chicken too).Toss all well then add mustard sauce, tomato ketchup, peanut butter, salt and pepper. Mix well. Your delicious butter fried baby onion with fish is ready. Relish hot butter tossed baby onion with fish with bread rolls and a bowl of creamy soup.
Butter Tossed Baby Onions With Fish

Be Happy And Stay Healthy.
Share
Tweet
Pin
Share
No comments
Broccoli Mushroom and Beet With Garlic Greens
Broccoli Mushroom and Beet with garlic greens is a very colorful winter dish. You can have it as a spicy garlic flavored salad or as a side dish. Garlic is very useful during winter months.Like other natural supplements that stimulate your immune system, garlic may decrease the frequency of the common cold—by as much as 64 percent, according to a 2001 study in Advances in Therapy.Green garlic is still technically garlic and contains all the amazing health benefits found in a mature bulb. Garlic is notable for its immune-boosting qualities: allicin, the sulfur compound found in garlic, responsible for its pungent smell and taste, is a natural antibiotic and can help the body block infections. If you suffer from anemia or low iron levels, garlic also helps to keep iron levels high. Most people know that vitamin C helps increase iron metabolism, but garlic contains the protein ferroportin that carries stored iron from inside a cell to outside of the cell, assisting the body as needed.So this recipe is loaded with garlic benefits and with all other benefits of vegetables and mushroom. I am sure you all will love Broccoli mushroom and beet with garlic greens.

Broccoli Mushroom and Beet With Garlic Greens

Ingredients
  • 6 to 8 florets of broccoli
  • 2 peeled beetroot balanced cut into chunks 
  • 8 to 10 button mushroom balanced cut into halves
  • 1/2 cup green peas
  • 1 cup garlic greens finely chopped
  • 5 to 6 garlic cloves
  • 1 tbsp tomato garlic sauce
  • 1tsp schezwan sauce
  • 1 tsp sesame seed
  • 3 to 4 tbsp sesame oil
  • to taste salt and pepper
Broccoli Mushroom and Beet With Garlic Greens

Cooking Directions
  1. Heat oil in a pan. Add chopped garlic and sesame seed. Fry till brown. Then add beetroot chunks, broccoli, button mushroom and green peas. Toss and fry the vegetables. Add salt, pepper, tomato garlic sauce and schezwan sauce. Mix well and fry a little more. At the end add finely chopped garlic greens. Mix well and put off the flame.You can have it as a spicy salad or as side dish with your favorite bread roll.
Broccoli Mushroom and Beet With Garlic Greens

Be Happy And Stay Healthy.
Share
Tweet
Pin
Share
No comments
Ten Minute Pasta

In a busy day when you need some easy fix, can try this delicious ten minutes pasta recipe. Good for anytime whether it is for breakfast, lunch or dinner. It never turned me down after a busy day it bring smile to my face and my dear ones. Make it more healthy adding more veggies, egg or cooked shredded chicken. I am sure you will love this delicious ten minutes pasta recipe.


Ten Minutes Pasta

Ingredients
  • 250 gm pasta
  • 1/2 cup carrot chopped
  • 1 green bell pepper cubed 
  • 2 baby corn thinly sliced blanched
  • 1 onion sliced
  • 5 cloves garlic crushed
  • 1 tbsp pasta sauce
  • 2 tbsp cream cheese
  • 1 tsp olive oil
  • 1/2 tsp oregano
  • to taste salt and pepper
Ten Minute Pasta
Cooking Directions
  1. Cook the pasta according to the pack instructions. In a small bowl mix cream cheese, pasta sauce and oregano. You can use any veggie or cooked chicken in it. I use the those are handy to me. Heat olive oil add crushed garlic, sliced onion, carrot , bell pepper , baby corn. toss all well. Add the cooked pasta with cream cheese pasta sauce mix. Mix well. Check the seasoning and add if needed.Put off the flame. You can make it more delicious by adding grated cheese if calorie count is not your take but I skip that temptation. Garnish with fresh mint sprig or basil. Your quick and fast 10 minutes pasta is ready to relish.
Ten Minute Pasta
Be Happy And Stay Healthy.

Share
Tweet
Pin
Share
No comments
Mushy Peas

Mushy peas is a very delicious traditional accompaniment from Britain.Though it is traditionally made with marrow fat peas.But I use fresh peas and it turns out delicious.In Northern England and the Midlands they are a traditional accompaniment to fish and chips, although their appeal has spread and sometimes mint is used as a flavoring. All over Britain, but particularly associated with Northern England they are commonly served as part of the popular snack of pie and peas (akin to the Australian pie floater, but with mushy peas instead of a thick pea soup) and are considered a part of traditional British cuisine.Mushy peas are also sometimes served in batter as a pea fritter.I follow traditional methods and to garnish add some chopped onion which is bit far from traditional but it add a crunch to this smooth paste. Skip if you want to stick to the traditional mushy peas recipe. I am sure you all will love this.


Mushy Peas

Ingredients
  • 1 cup peas
  • 2 cup water
  • 1 tbsp unsalted butter/ diet butter
  • 6 to 8 mint leaves
  • 1 tsp fresh cream
  • 1 tsp lemon juice
  • 1 tsp sea salt and pepper
Mushy Peas

Cooking Directions
  1. Cook peas and mint in a large saucepan of boiling water for 5 minutes or until bright and tender. Drain. Remove and discard mint.
  2. Transfer peas to a bowl. Add butter, cream. Mash with potato masher or wooden spatula or you can put in your blender to make smooth paste. Add lemon juice. Season with black salt and pepper. I like little coarse so use a masher. Mash and mix well or process until combined. Spoon into a bowl. Serve with crispy fish and chips.
Mushy Peas

Be Happy And Stay Healthy.


Share
Tweet
Pin
Share
No comments
Healthy Honey Banana Dates Smoothie

If you're really looking for a healthy breakfast which is loaded with nutrient but also keep you full till your next meal then juices may not be the best idea. Smoothies, however, could be your best keep; the blended beverage offers you tons of nutrition as well as protein and fiber to keep you fresh and full.Today sharing with you a very delicious super healthy honey banana dates smoothie.This healthy smoothie recipe make it easy to eat healthy with fruit, immune-boosting yogurt, natural sweetener like dates, honey good for all and even the one who are a keen weight watcher.Skipping breakfast is not good for health but slurp down this smoothie at breakfast which is quick and easy, and you'll feel satisfied until lunchtime. So enjoy this super healthy honey banana dates smoothie.

Healthy Honey Banana Dates Smoothie

Healthy Honey Banana Dates Smoothie


Ingredients

  • 1 banana
  • 6 to 8 seedless dates
  • 6 to 8 walnut
  • 1 cup yogurt
  • 1 tsp honey
  • 1/4 cup water
  • 2 pinch cinnamon powder
  • a pinch salt and pepper
Cooking Directions
  1. Blend banana, honey, dates, yogurt, walnut, water, cinnamon powder, salt and pepper. Pour in your favorite glass. Top with honey. Enjoy a super healthy yummy smoothie.
Healthy Honey Banana Dates Smoothie

Be Happy And Stay Healthy.
Share
Tweet
Pin
Share
No comments
Garlic Chicken With Bell Pepper

A very delicious dish worth try whenever you want to try something hot and fiery. Do you know that chicken is one healthy option in the meat and bean group, but a person must know how to eat chicken to lose weight and eat a healthful diet.Choose boneless, skinless chicken breasts for the leanest option. A dieter can buy the breasts boneless or without skin, or he can purchase the breasts with skin and bones, then cut away before cooking.Balance the healthy chicken with fruits, vegetables and whole grains. For proper nutrition, especially when dieting, a person should consume healthy foods from each of the food groups each day.I am sure you will love this awesome Garlic Chicken with Bell pepper.


Garlic Chicken With Bell Pepper

Ingredients
  • 250 grm boneless chicken cubes
  • 1 cup red green n yellow bell pepper cubes
  • 1/2 onion flakes (optional)
  • 1 tbsp garlic paste
  • 2 tbsp tomato paste
  • 1 tsp dry roasted chilly flakes (optional)
  • 1 tbsp sesame oil 
  • 4 tbsp vegetable oil
  • 1 egg
  • 1/2 tsp + 1 tsp cornstarch
  • 1 tsp lime juice
  • 1 tsp soy sauce
  • 1 cup chicken stock
  • to taste salt and pepper
Garlic Chicken With Bell Pepper

Cooking Directions
  1. Mix 1/2 tsp cornstarch with egg, little salt and pepper whisk well. Marinate the chicken cube with the mixture. Heat oil. Now fry the chicken cubes and set aside. Heat 1 tbsp sesame oil add garlic paste. Stir and then add tomato paste, onion and bell pepper. Stir well. Then add fried chicken . Mix well. Add 1 tsp cornstarch, soy sauce with 1 cup stock. Mix well. Let it come to boil then as the sauce thickens adjust seasoning put off the flame. Add chilly flakes and and lime juice. Mix well. Spread garlic chicken with bell pepper in a bed of vegetable fried noodles and enjoy and delicious dinner.
Garlic Chicken With Bell Pepper

Be Happy And Stay Healthy.
Share
Tweet
Pin
Share
No comments

This is a very delicious healthy recipe. I can take the raw flavor of fish so fried a little but if you can then steam the raw fish. It taste awesome.Fish is a really nutritious food, being rich in protein, vitamins and minerals which are essential to maintain good health. Frequent consumption of white fish, improves blood pressure, lowers cholesterol and reduces weight, according to a study conducted by researchers at the Nutrition & Obesity Unit of Hospital Ramón y Cajal in Madrid.


Whole Fish Cooked in Chinese Style With Pepper and Baby Corn

Ingredients
  • 1 whole white flesh fish(bassa/ bhetki (barrmundi)/talapia)
  • 1 red bell pepper finely sliced
  • 4 small baby corn slit from in between
  • 2 inch ginger peeled and finely julienned
  • 2 tbsp soy sauce
  • 1 cup chicken stock
  • 1 tsp castor sugar
  • 2 tsp sesame oil
  • 1tsp Chinese red chilly sauce
  • 2 tbsp or to taste white whine vinegar
Cooking Directions
  1. Clean the fish and make a diagonal cuts into the fish down to the bones on both sides. I fry the fish in sesame oil just to get over the rawness but you can steam as it is. Now in a bowl mix take soy sauce, sugar, chicken stock, sesame oil, red chilly sauce and white whine vinegar. Mix well now in a heat proof plate place place the fish and pour the sauce mixture on it.Top it with ginger julienne and scatter sliced red pepper and baby corn on top and sides, if you want you can add fine julienned of scallions and finely chopped coriander. Let the water come to boil in the steamer now steam the fish with the lid on. Cook till the fish is cooked but the pepper is not too soft.
  2. Gently lift the fish out of the steamer, reserving the liquid. Place the fish on plates or in shallow bowls. Divide the ginger, baby corn and capsicum between the plates and pour the remaining liquid over fish.
  3. Serve with stir fried noodles or jasmine rice.

Be Happy And Stay Healthy.


Share
Tweet
Pin
Share
No comments

Shell pasta are actually known as conchiglie in Italian. A miniature variety called conchigliette. I am sure you all will like this easy but delicious and healthy pasta recipe with conchigliette, that I am sharing with you all today. You can make water poached egg and top it with if you want this recipe to be more healthy but this gooey style of eggs add on more creamy richness to this pasta. I use whole black pepper in this recipe which may seem bit new to you all but black pepper has it's own medicinal values, it is used to improve digestion, stimulate appetite, and treat gastrointestinal problems. So more health add in this recipe. Give this easy quick shell pasta with gooey egg scramble a try and enjoy a delicious meal.


Shell Pasta With Gooey Egg Scramble

Ingredients
  • 1 pack shell pasta
  • 1 cup tomato puree
  • 2 tbsp tomato paste
  • 1 tsp chopped garlic
  • 1 onion chopped
  • 1/4 cup bell pepper cubes
  • 3 to 4 egg
  • 1/2 tsp oregano
  • 1/2 tsp basil
  • 1/4 tsp cumin powder
  • 4 tbsp grated cheese
  • 2 tbsp olive oil
  • 1/2 tsp whole black pepper
  • 1/2 tsp sugar
  • 1 tsp salt and pepper
Cooking Directions
  1. Cooked the shell pasta according to package instruction. On a low heat place a pan grease with very little oil, break the eggs one by one into the pan wait for few second then scramble the egg so that it remains gooey. Keep aside. Heat oil in pan. Add whole black pepper, chopped garlic,onion and bell pepper.Fry till onions are translucent. Now add tomato puree, tomato paste, basil, oregano, cumin powder, sugar, salt and pepper. Mix well.
  2. Let it cook for few second then add the cooked pasta. Mix well. Put off the flame. Serve in a plate and top with gooey scramble egg and grated cheese. Enjoy Shell pasta with gooey egg scramble.

Be Happy And Stay Healthy.


Share
Tweet
Pin
Share
No comments

Today I am sharing with you all a delicious fruit salad paired with yummy toasted Indian cottage cheese. This salad is loaded with the goodness of all fruits and Indian cottage cheese.It is a great source of calcium, which is helpful in maintaining strong teeth and bones. Due to its low lactose content, it protects the teeth against harmful sugars.It is a rich source of protein, vitamins and calcium etc. It is very good for growing children. Vitamins B complex, present in Indian Cottage cheese are essential for the formation and strengthening of cartilage, productions of tissues in the body. in children, women (pregnant and lactating) and men. These dairy products also facilitate proper absorption and distribution of calcium in the body and provide protection against diseases such as beriberi.It is very useful for digestive systems by activating the hydrolysis of the protein.So what are you waiting for enjoy this light and healthy weekend breakfast.


Fruit Salad With Toasted Indian Cottage Cheese

Ingredients
  • 1 cup small apple cubes
  • 1/2 cup small cucumber cubes
  • 1/2 cup watermelon seeded cubes
  • 1 tomato seeded cubes
  • 2 tsp finely chopped ginger
  • 2 tsp soy sauce
  • 2 tsp lemon juice
  • 1 tbsp sesame oil/ vegetable oil
  • 1 tsp sugar/ honey/ sugar substitutes
  • to taste salt and pepper
  • 6 to 8 cubes of Indian cottage cheese
  • 1 tsp butter
  • to taste salt and pepper
  • 4 fresh sprigs of mint
Cooking Directions
  1. Take a bowl in it take oil, chopped ginger, lemon juice, sugar, soy sauce, salt and pepper. Mix well.
  2. Now heat butter in a flat pan. Sprinkle salt and pepper in the cheese cubes. Now toast the cheese cube in the butter. Keep aside.
  3. Take a bowl add all the fruit cubes and tomato cubes. Add the vinaigrette. Mix well. Serve with hard toasted bread and Indian cheese cube. Garnish with fresh mint sprigs. Enjoy a healthy breakfast.

Be Happy And Stay Healthy.


Share
Tweet
Pin
Share
No comments

March 17th St ' Patrick's Day and surely Green is now the color of the day, with some Irish Blessings saying May joy and peace surround you, contentment latch your door, and happiness be with you now and bless you evermore...let  me share with you all a delicious finger licking green dip. It's quick to make and awesome creamy to have with chips nachos or you may even use it as a bread spread. Enjoy delicious green dip and wish you all HAPPY ST. PATRICK"S DAY. Enjoy green.


Green Dip

Ingredients
  • 1 cumber cut into dices with skin
  • 1 green bell pepper
  • 1 onion cubed
  • 6 to 8 garlic clove
  • 1 small boiled potato
  • 1/2 tsp thyme
  • 1 tbsp finely chopped mint and cilantro leaves
  • 2 tsp olive oil
  • 1/2 tsp butter
  • 1 tsp fresh cream
  • 4 tbsp lemon juice or to tatse
  • 2 pinch sugar
  • to taste black salt and pepper
  • 1/4 tsp chilly flakes to garnish
Cooking Directions
  1. Heat oil in a pan add garlic, onion, green bell pepper, cucumber and potato with black salt, pepper and sugar and saute for a minute or two. Then cool the mixture and put it in a blender with butter, finely chopped mint and cilantro, thyme. Blend till the mixture is very smooth. Then add lemon juice and fresh cream and mix well. Garnish the dip with chilly flakes and serve with nachos or chips.
Be Happy And Stay Healthy.


Share
Tweet
Pin
Share
No comments

What better way to gain the strength and energy to carry you through a hectic morning schedule than with a steaming bowl of freshly cooked oatmeal.It's the most perfect way to start a day.Oats, oat bran, and oatmeal contain a specific type of fiber known as beta-glucan. Since 1963, study after study has proven the beneficial effects of this special fiber on cholesterol levels.Studies show that in individuals with high cholesterol (above 220 mg/dl), consuming just 3 grams of soluble oat fiber per day (an amount found in one bowl of oatmeal) typically lowers total cholesterol by 8-23%. This is highly significant since each 1% drop in serum cholesterol translates to a 2% decrease in the risk of developing heart disease.Oats, via their high fiber content, are already known to help remove cholesterol from the digestive system that would otherwise end up in the bloodstream. Now, the latest research suggests they may have another cardio-protective mechanism. Antioxidant compounds unique to oats, called avenanthramides, help prevent free radicals from damaging LDL cholesterol, thus reducing the risk of cardiovascular disease, suggests a study conducted at Tufts University and published in The Journal of Nutrition. In laboratory studies reported in Surgery, beta-glucan significantly enhanced the human immune system's response to bacterial infection. Beta-glucan not only helps neutrophils (the most abundant type of non-specific immune cell) navigate to the site of an infection more quickly, it also enhances their ability to eliminate the bacteria they find there.Starting your day with a bowl of oatmeal may boost your immune response in addition to your morning energy levels.Studies also show that beta-glucan has beneficial effects in diabetes as well. Type 2 diabetes patients given foods high in this type of oat fiber or given oatmeal or oat bran rich foods experienced much lower rises in blood sugar compared to those who were given white rice or bread. Starting out your day with a blood sugar stabilizing food such as oats may make it easier to keep blood sugar levels under control the rest of the day, especially when the rest of your day is also supported with nourishing fiber-rich foods. Today we are sharing with you a delicious healthy recipe that will boost your immune and keep you stay heart healthy. For those who are strictly on health issue do skip cheese.Oat soup is a yummy healthy dish can be enjoyed by all. So don't wait try a healthy yummy oats soup.


Oats Soup

Ingredients
  • 1 cup oats
  • 2 tbsp finely chopped beetroot
  • 5 to 6 small broccoli florets
  • 1/4 tsp whole cumin seed
  • 1/4 tsp finely garlic choped
  • 1/2 tsp finely chopped onion
  • 1 tsp finely chopped mint and cilantro leaves
  • 1 tsp finely sliced cheese (optional)
  • 1 1/2 cup warm water
  • 1 tbsp fresh tomato puree
  • 1 tsp olive oil
  • 1/2 tsp lime zest
  • 1 tsp lime juice (optional)
  • to taste salt and pepper
Cooking Directions
  1. Heat oil in a pan add the whole cumin, chopped onion and garlic. Toss a little then add chopped beetroot and broccoli. Toss a bit then add tomato puree add salt and pepper. Add oats and mix with the veggies. Add warm water. Cook till the oats are done stirring continuously so that no lumps are formed. Now add lime zest and lime juice (if using) this give a very fresh aroma to this soup. Garnish with chopped coriander and mint leaves and few fine slices of cheese if using. Enjoy a hearty healthy oats soup.

Linking it to Eat Nutritious, Feel Fabulous Challenge started by Jagruti and Nivedita.


Be Happy And Stay Healthy.


Share
Tweet
Pin
Share
No comments

Burnt garlic and sesame beetroot is a very healthy and quick to make recipe. Garlic is very useful in winter it contains Allicin, which contributes to its antimicrobial, antifungal, expectorant and immune stimulant qualities.Consume garlic in your diet, clinical trials has shown garlic increases the quality, quantity and killing power of natural killer cells tenfold! This certainly is reason enough to take garlic from the beginning to the end of flu season. On the other hand there are some foods we can eat this winter that will genuinely do us good.One front runner is beetroot.It contains good amount of calcium, magnesium, iron, phosphorous, potassium, manganese, folic acid and vitamin C.The natural dietary nitrates in beetroot have been found to have two powerful physiological effects, they dilate (widen) the blood vessels, which can both reduce blood pressure and increase blood flow to muscles and the brain. In turn, this increases oxygen supply to the muscles for energy production which is especially beneficial during intensive exercise. So now you know how health packed recipe is burnt garlic and sesame beetroot and it is awesomely delicious. So give it a try, stay healthy and enjoy the warmth of the season.


Burnt Garlic And Sesame Beetroot

Ingredients
  • 1 cup beetroot cubes blanched
  • 8 to 10 baby garlic
  • 1 small onion cube flakes (optional)
  • 1tsp sesame seed
  • 1 tsp tomato garlic sauce
  • 1/2 tsp soy sauce
  • 1 tsp lemon juice
  • 1 tsp sesame oil/ vegetable oil
  • to taste salt to pepper
Cooking Directions
  1. Heat oil then add baby garlic and sesame. Let them both brown. Add onion flakes let them just go transparent then add the blanched beetroot. Add salt , tomato garlic sauce, soy sauce and pepper. Mix well. Add lemon juice and put off the flame. Your burnt garlic and sesame beetroot is ready to serve. Serve on a bed of iceberg lettuce. Relish this anytime healthy dish burnt garlic and sesame beetroot.

Be Happy And Stay Healthy.


Share
Tweet
Pin
Share
No comments

Temperature in my town is raising and it’s too hot and so I look for dishes which are light yet delicious and give you a very fresh feeling . Pepper and corn are two favorite ingredients of mine and in a summer day what can be more refreshing than lemon. So when all go together something delicious is about to happen so here comes for you an awesome summer dish pepper and baby corn in lemon sauce.


  Pepper n Baby Corn in Lemon Sauce

    Ingredients
  • 1 cup baby corn cut into bite size blanched

  • 1 green bell pepper cut into thin strips

  • 1 tomato skinned seeded cut into thin strips

  • 1 onion chopped

  • 1 tsp garlic chopped

  • ½ tsp ginger chopped

  • 1 tsp chilly garlic sauce

  • 1 tsp lemon rind

  • 1 to 2 tbsp lemon juice

  • 1 ½ cup chicken stock/ vegetable stock/ water

  • ½ tsp sugar (optional)

  • 1 tbsp sesame oil

  • to taste salt and pepper


Cooking Direction
Heat sesame oil then add the chopped garlic. Stir for 2 sec then add the onion and ginger. Stir for another 2 to 3 sec. Then add the chopped green bell pepper and blanched baby corn. Stir and cook for a minute. Add the chicken stock or whatever you are using or handy to you. Let it boil for a minute. Then add chilly garlic sauce, salt, pepper and sugar( if using). Cook for another few second then mix cornflour with water and add to the gravy. Cook for another minute or two.When the gravy starts to thicken add lemon rinds and lemon juice. Put off the flame. Cover and give 5 to 6 minutes standing time so that the flavor of lemon get well mixed in the sauce. Serve hot with bread rolls.


Be Happy And Stay Healthy.


Share
Tweet
Pin
Share
No comments

Prawn in apple butter sauce is a very delicious easy to cook recipe and in one word if I tell you it is just awesome. The end taste is little sweet tart and tangy. If you have love seafood specially prawn and you already tired thousands of dishes with prawn and now looking for something new then give prawn in apple butter sauce a try....I am sure this weekend you will have one more dish to add to your favorite list. Give prawn in apple butter sauce a try and let me know how you all like it.


Prawn In Apple Butter Sauce

Ingredients
  • 8 to10 prawn
  • 1 apple seedless chopped
  • 1 tomato
  • 1 tsp black salt
  • 1/2 tsp chilly sauce (optional)
  • 1/2 tsp chopped garlic
  • 8 to 10 cashew
  • 1 tbsp butter/ diet butter
  • 1/4 tsp sugar
  • 1/4 cup prawn stock/ water
  • 2 tbsp chopped parsley/cliantro 
  • 1 tsp lemon juice
  • to taste salt and pepper
Cooking Directions
  1. Clean and devein the prawns well and pat dry.
  2. In your blender take chopped apple pieces and tomato pieces, salt, sugar, cashew, black salt , black pepper, chilly sauce, sugar. Make a smooth paste. Heat butter in a skillet and then add chopped garlic. Stir for a few seconds. Then add the apple paste. Stir for a minute then add the prawn. Stir for a minute. Then add the prawn stock/water cook for 3 to 4 minutes. When sauce thickens add chopped parsley and lemon juice. Serve hot with bread rolls or a small portion of butter rice.

Be Happy And Stay Healthy.


Share
Tweet
Pin
Share
No comments

I am a little health freak but sometimes when it comes to eating baby potatoes I can’t stop my carving. Though known for long as devils food recently it is blessed with a study which says that new potatoes has only 26 calories and is packed with nutrients. This is a key to lasting weight loss as eating potato will keep you feel full for longer says Dr. Jacquie Lavin, an eminent doctor for Slimming World. As potato is complex carbohydrate it is good during hunger pangs and thus control eating binge.Potatoes are also rich source of Vitamin B, folate and minerals such as potassium  magnesium and iron. Potatoes are underground tuber, meaning they store all the vitamins and minerals needed for growing new potato in spring.Norwich Food Research Institute have found that potatoes have some blood pressure lowering molecules called kukoamines. The Agricultural Research Service in Navarre, America has identified 60 different kinds of phyto chemicals and vitamins in potato skins.Many of these are flavnoinds, which protect against cardiovascular disease by lowering the levels of bad cholesterol and keeping arteries fat free. When I get to know so much about this baby delights I can’t stop myself to make an awesome dish which is easy yet tasty. I keep the skin on to get the full benefit. Pair spicy cheesy baby potatoes with smoked salmon or chicken or have it just like a snacks. I hope that you all will like it.


Spicy Cheesy Baby Potatoes

Ingredients
  • 10 to 12 baby potatoes ( boiled)
  • 1 tsp  butter/ olive oil
  • 1tsp grated garlic
  • 3 tbsp grated cheese
  • 1 tbsp lemon juice
  • 1/4 tsp paprika powder
  • 1 tsp salt
  • 1 tsp chopped parsley
Cooking Directions
  1. Heat butter or oil whatever you are using in a skillet. Add garlic and fry till you get the fried smell, then add the baby potatoes. Add salt and paprika ( if paprika is too hot then you can go with black pepper). Now stir fry the baby potatoes till the skin is crispy. Now add grated cheese. Mix well. Finish it off with a good dash of lemon juice and chopped parsley.

Be Happy And Stay Healthy.


Share
Tweet
Pin
Share
No comments

For past few days due to some tight work schedule I need to make some quick yet filling lunch. So other day I cook this pasta omellete, this is awesomely delicious and you can add any vegetable, fish, seafood, meat of your choice and make it within minutes but to make perfect omelet there is simple trick go through the recipe and see and you will know it. The best part of this pasta omelette recipe is you can use your leftover to make a wonderful dish. Try this quick, easy and delicious pasta omelette and enjoy a filling savory lunch.


Pasta Omelette

Ingredients
  • 1 cup boiled pasta
  • 1 sliced onion
  • 1/4 cup cooked chicken cube
  • 1/4 tsp chicken seasoning powder
  • 1 clove crushed garlic
  • 4 to 5 eggs
  • 1 tbsp cheese sauce
  • 2 tbsp olive oil
  • 2 tbsp grated cheese
  • 1 tbsp finely chopped parsley
  • Salt and pepper to taste
Cooking Directions
    Heat a teaspoon of olive oil in pan. Add sliced onion and crushed garlic. As the onion became transparent add cooked chicken, boiled pasta and cheese sauce, parsley and seasoning powder. Mix well. Add salt and pepper if needed. Toss and then put off the flame. Let the mixture cool down. Now in another bowl lightly beat eggs here lies the trick the amount of egg should be such so that it can hold all the other ingredients added to it. Add pinch of salt and pepper. Add the cooked pasta and mix well. Heat rest of the olive oil in a pan and pour the mixture. This pasta omelette is much heavy than the regular omelette. Let it set in a medium flame for 3 to 5 minutes. Then cook in a low flame for another 2 to 3 minutes until the base is golden. Leave to cool for 5 minutes in the pan then cut into wedges. Garnish with grated cheese and tomato pasta sauce. Serve hot and relish.

Be Happy And Stay Healthy.


Share
Tweet
Pin
Share
No comments


In my last post I told that the temperature in my town is raising and it raise to 42 degree. The moisture is high too and it is the most awful situation when you have to cook in front of the open flame. My house is not centrally air conditioned which I am trying to do may be by next two months but till then I have to bear the heat in my kitchen. In such time I play some clever tricks just try out something that need less than 10 minutes. Pepper prawn is one such delicious side dish which can be prepared quickly and you can relish with your favorite bread rolls. I am sure you will love the succulent taste of pepper prawn.


Ingredients:
Prawns       10 to 12
Onion 1 thickly chopped
Olive oil / butter 1tsp
Freshly chopped mint leaves 1 tsp
Pomegranate seed 1tbsp
Lime juice 1 tsp
Freshly crushed pepper to taste
Salt to taste

Procedure:

Heat olive oil or butter whatever you are using . Then add the clean deveined prawns. Toss for few second. Now add the chopped onion. Toss and cook for a minutes so that the onion get soft and transparent. Now add pomegranate seeds, salt and freshly crushed black pepper. Toss again. Now put off the flame and add finely chopped mint leaves and lime juice. I love to have it with my garlic bread but you can have it with any bread of your choice. By the way I will be celebrating my birthday on the 5th so come back to know my birthday recipe.


Be Happy And Stay Healthy.


Share
Tweet
Pin
Share
No comments

About me

About Me


COOKING SPEAKS TO ALL MY SENSES

Follow Us

  • facebook
  • twitter
  • instagram
  • Google+
  • pinterest
  • youtube

Categories

recent posts

Sponsor

Facebook

Blog Archive

  • August 2018 (62)
  • July 2018 (4)
  • June 2018 (4)
  • May 2018 (3)
  • April 2018 (4)
  • March 2018 (4)
  • February 2018 (2)
  • January 2018 (3)
  • December 2017 (4)
  • November 2017 (3)
  • October 2017 (3)
  • September 2017 (4)
  • August 2017 (3)
  • July 2017 (5)
  • June 2017 (4)
  • May 2017 (2)
  • April 2017 (3)
  • March 2017 (3)
  • February 2017 (3)
  • January 2017 (4)
  • December 2016 (4)
  • November 2016 (4)
  • October 2016 (4)
  • September 2016 (5)
  • August 2016 (4)
  • July 2016 (3)
  • June 2016 (4)
  • May 2016 (3)
  • April 2016 (4)
  • March 2016 (4)
  • February 2016 (3)
  • January 2016 (4)
  • December 2015 (4)
  • November 2015 (5)
  • October 2015 (4)
  • September 2015 (4)
  • August 2015 (5)
  • July 2015 (1)
  • November 2014 (1)
  • July 2014 (2)
  • June 2014 (2)
  • May 2014 (2)
  • April 2014 (1)
  • March 2014 (2)
  • February 2014 (2)
  • January 2014 (5)
  • December 2013 (4)
  • November 2013 (2)
  • October 2013 (4)
  • September 2013 (2)
  • August 2013 (2)
  • July 2013 (4)
  • June 2013 (3)
  • May 2013 (4)
  • April 2013 (3)
  • March 2013 (4)
  • February 2013 (4)
  • January 2013 (4)
  • December 2012 (5)
  • November 2012 (3)
  • October 2012 (5)
  • September 2012 (6)
  • August 2012 (5)
  • July 2012 (4)
  • June 2012 (5)
Created with
Copyright © FUN COOKING