• HOME
  • ABOUT
  • CONTACT US
  • DISCLAIMER
  • SITEMAP
  • PRIVACY
facebook twitter instagram pinterest bloglovin Email

FUN COOKING

Find Good and Natural Recipes

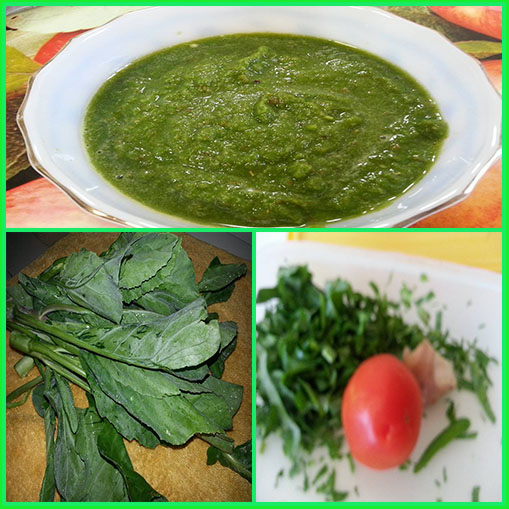
Aaloo pakodi sabzi is made  when there is no green vegetable is available  just like in rainy season. This is very delicious and easy to make. Here below is its full recipe:
Ingredients
2 potatoes
6 pakodies
2 tbsp of oil
Pinch of asafetida
1 tsp of cumin seeds
1 tbsp of grated ginger
1/2 cup of chopped onion
2 tomatoes
1 tsp turmeric powder
Salt to taste
½ tsp red chili powder
½ tsp of garam masala
1 finely chopped green chili
Cilantro for garnishing
Method
1. For Pakoris/pakodis see one of my previous post Pakodi/Fulki.
2. Wash, peel and cut the potato into bite sized pieces.
3. Heat oil in a pressure cooker. Add asafetida, cumin seeds and let it crackle.
4. Now add ginger and onion and let it be light brown.
5. After that put finely chopped tomatoes with salt, turmeric powder,  red chili and green chili.  Cook it till oil separates from it.
6. Next add potatoes and stir well.
7.  After that add 4 cups of water.  Close the lid of pressure cooker.
8.  When first whistles comes, lower the flame to its lowest.  Cook it for 7 minutes.  After that remove from fire.
9.  Now let it get be cooled completely.  Open the lid and add pakodis/pakoris to it and cook it for 5 minutes with half covered lid.
10.  Put off the flame.  Now add garam masala and finely chopped cilantro leaves.
11.  Aaloo pakodi sabzi is ready to serve.
Enjoy Healthy Cooking!!!
See more recipes:
How to Steam corns in Microwave  
Healthy Bhutta or Corn   
Palak Paneer    
Tori Peels Paneer Saag    
Bottle Gourd Zest Kofta Curry   
Bhiss(lotus stem) & Aaloo Sabji   
Leafy Potatoes (wild sweet leaves)    
Tiny Pumpkin with Spring Onion leaves   
Guava Sabji  
Kachalu Dahi (curd) Wale    
Baigan (brinjal) Bhurta    
Stuffed capsicum with Potato    
Potatoes with Spinach Chutney    
Stuffed Green chili Peppers (peanuts)  
Mint Paneer Pasanda   
Bhindi Sabzi in Microwave   
Stuffed Karela with cabbage   
Stuffed Parwal/Parval   
Milky Corn Methi Paneer 
Bhutte Ki Bhurzee/Bhurtha 
Onion Stuffed Simla Mirch
                                                ------------------
Reproduction of the contents of this blog, without permission, in whole or in part is strictly prohibited. 
Share
Tweet
Pin
Share
No comments
Taro root and its leaves are used in making various dishes. Few days back, I tried to make its stuffed parantha and roti.  It came out so nice and delicious that I have not imagined to that extent.  Here below is its full recipe how I made it:
Ingredients
1 small sized  boiled kachalu/taro root
1 small finely chopped onion
2 tbsp of chopped onion green leaves
1 finely chopped green chili
1/2 cup of finely chopped cilantro
1 inch piece of grated ginger
salt to taste
1/2 tsp of garam masala
1/2 tsp of ajvain seeds
1 tsp of coriander powder
1/4 tsp of mango powder
For dough
2 cups of wheat flour
1 cup of water
handful of wheat flour for rolling
oil for frying
Method
1. Wash thoroughly with water to remove all the mud and dirt.
2.  Now boil it in pressure cooker for 8-10 minutes depending on the size of the taro root. For this see the post  "how to boil kachalu" in this blog.
3.  Now peel the boiled kachalu after getting it cool off completely.
4.  Now keep it in the refrigerator for 2 to 3 hrs.
5.  Now grate it with grater or cut into pieces and mash with any tong/chimta by holding between the tong and press.  I prefer it to grate rather than mashing.
6.  Before mixing all the ingredients for stuffing, make the dough with water.  Take the same ratio of wheat flour and water.  It should  be soft. Keep it for 10 minutes.

7. Now mix grated kachalu, both the onion, cilantro, fresh green chili, ginger, salt, mango powder, garam masala, coriander powder, ajvain seeds/carom seeds and mix with hand.
8. Heat the tawa on medium flame.
9.Now make the balls out of dough.
10. Take one dough ball and roll it with rolling pin in round shape with the help of dry flour.
11. Place handful of kachalu mixture on rolled roti and gather it from all sides and make flat ball out of it. Now press gently with palm to make it more flatten. Now apply dry flour to it and roll it on wooden surface with rolling pin.
12. Next place it on heated tawa or  non stick pan. When one side seems dry, turn it to another side and apply oil to both the sides and cook till it gets crispy.
13. Tempting kachalu parantha is ready to serve. It can be served with curd, butter, pickle and chutney.
Stuffed Roti
1. Follow the above mentioned method for parantha  from steps 1 to 11.
2. After step 11, place the rolled stuffed roti on heated tawa.  When it seems dry from one side turn it to the other side.
3.  Now cook it by pressing some small kitchen cloth towel from both the sides or puff it on direct flame by turning very quickly on both the sides.
4,  Swadisht stuffed kachalu roti is ready to serve. Little pure ghee can be applied to it. Enjoy it with curd.
Enjoy Healthy Cooking!!!
See more recipes:
Kuttu Flour Puda or Chilla    
Chili Chilla  
Spicy Grilled Baby Corn Kabab    
Namkeen Puda or Chilla
Bread Tikki chaat  
Corn stuffed Mirch Pakoras    
Double Colored Rice Poori    
Kale Patra or Patoud
Mathi or Mathiyan    
Papaya Parantha       
Kuttu &sweet Potato Roti      
Ajvaini Lacha Parantha      
Boiled Rice Parantha    
Bread Loaf    
Mooli Wali Makki roti   
Plain Makki Ki Roti   
sweet Bread (Tutti Frutti) 
Totilla's bhatoore
Tortilla Tandoori roti    

Chili Parantha
Gobhi Parantha 
Stale Roti Chaat
All Purpose flour/Maida dhokla 
                                            --------------
Reproduction of the contents of this blog, without permission, in whole or in part, is strictly prohibited.
Share
Tweet
Pin
Share
No comments
Raitas are made with many vegetables and ingredients. Here I have made phulki raita.  It is very delicious and goes well with main meal.  It is very easy and simple to make.  Here below is its full recipe:
Ingredients
2 cups of curd
8-9 besan phulkis
1 tsp of sugar
1/4 tsp of garam masala
1/4 tsp of roasted cumin powder
black salt to taste
few mint leaves
Method
1. First of all prepare the phulkis/fulkis.  For this see the post on this blog Pakodi/Fulki.
2.  Soak the fulkis in water. If using fresh, soak it for 2-3 minutes in fresh water.  But if using frozen phulkis soak it in warm water for 5-7 minutes.
3.  Take the curd, sugar, salt in a bowl.  Beat the curd with spoon or beater.
4.  Now squeeze the phulkis/fulkis with very gentle hand.
5.  Add the squeezed phulkis in beaten curd.  Add all the spices and hand torn mint leaves too.  Mix it thoroughly with spoon.
6. Fulki raita is ready to serve.
Enjoy Healthy Cooking!!!
See more recipes:
How to Make Cumin Powder  
Pakodi/Fulki        
Tamarind Paste        
Boiling Bamboo Shoots     
How to Roast Brinjals in OTG         
How to Roast Green Banana      
How to Microwave Raw Banana          
Tahini       
How to Roast Jobstears 
Healthy Bhutta or Corn         
 
Roasted Pumpkin Seeds         
How to roast Brinjals (Baingans)         
Roasted n Salted Soyabeans       
Roux Water or Lewi    
Leftover Rice Tikki     
Boiled rice Parantha       
Baked Brown Rice Pulav 
Khoya/Mawa  
Moong Beans Sprouts 
Tamarind Fruit raita      
Loki raita     
Brinjal Raita    
Pineapple Raita      
Bread Boondi Raita       
Jhatpat Dahi Bada chaat      
Petha Mithai 
                                           ------------------
Reproduction of the contents of this blog, without permission, in whole or part is strictly prohibited.                                               
Share
Tweet
Pin
Share
No comments
Kale Leaves/Phak-ka-na is a very healthy leafy vegetable which is full of iron and fibers. Today I made its chutney. Here below is full process of  its making:
Ingredients
handful of chopped tender kale/phakna leaves
1 chopped green chili
1 inch piece of ginger
1 ripe tomato
salt to taste
2 tbsp of lime juice
1 tbsp of coconut powder (optional)
1/4 tsp of garam masala
1 tsp of whole coriander
Method
1.  Wash and chop the tender leaves of phak-ka-na, chili, ginger and tomato.
2. Take the whole coriander, tomato, ginger, chili and kale leaves in a big container of blender with lime juice and blend it till smooth with little bit of water.
3. Next add salt, garam masala and coconut powder and blend it again.
4.  Kale chutney is ready. Transfer it into a serving bowl.
Enjoy Healthy Cooking!!!
See more recipes:
How to steam corns in microwave   
Healthy Bhutta or Corn   
Palak (Spinach) Chutney     
Marua ( Sweet Basil) chutney     
Sweet and Sour Guava dip     
Cabbage & Papaya Seeds chutney     
Cucumber Peels Chutney     
Leftover Lemon Zest Jam or chutney    
Instant Pineapple Dip     
Tori Peels Chutney    
Hummus     
chatpate Orange Peels     
Ripe Banana Chutney  
Kairi chutney  
 Red chutney   
Coconut Malai chutney  
 Sandesh/Paneer Peda  
Moong Dal Kachori 
Peas Chutney
                                    --------------
Reproduction of the contents of this blog, without permission, in whole or in part is strictly prohibited.
Share
Tweet
Pin
Share
No comments
Stained/broken glass rabdi cake is very delicious and attractive dessert. It is very easy to make.  Here below is how we can make it:
Ingredients
For Jelly
2 cups of water
1 tsp of agar agar powder
1/4 cup of sugar
For Rabdi
1 cup of milk
1 small tin of sweetened condensed milk
1 tsp of agar agar powder
handful of mixed and chopped almonds, cashews and raisins
2 tbsp of finely chopped pathe ki mithai
1 small tin of cocktail fruits
Food colors
Method
1. First of all prepare jelly.  For this take 2 cups of water with 1 tsp of agar agar powder and mix.  Keep the pan on heat and let it boil till it dissolves completely.  Next add sugar and again boil it till sugar dissolves completely.  Remove from heat.
 2.  I have made 3 colors of jelly. Therefore, I divided this into three separate bowls. I poured 1 drop of food color of each color in each bows. Now pour the jelly mixture into three bowl and mix the color properly.
3.  Keep it in the refrigerator to get it set perfectly at-least for 5 to 6 hrs.  After that cut into tiny pieces or of your desired shape with knife. Jelly is ready.  Keep it aside.
4. Take the milk in frying pan and let it boil. Now pour the milkmaid from the can and mix well.  Meanwhile again take one cup of water and 1 tsp of agar agar powder in a small pan and let it boil till agar agar completely  dissolves.  
5.  Now pour this into milkmaid rabdi and mix well.  Let it boil again. and remove from fire.
6.  Now add all the dry fruits , finely chopped pathe ki mithai, and fruits and mix well.
7. Next pour into any tray or big serving bowl of any shape.  
8. Keep it in the refrigerator to get it set properly for few hours or atleast 4 hrs.
9.  Stained/broken glass rabdi cake is ready to enjoy.  Serve it chilled.
Tip
1.  Jelly can be bought from the market too.
Enjoy Healthy Cooking!!!
See more recipes:
Thick Rabdi 
Somtam Papaya Salad  
Tom Yam Soup (veg.)  
Double Colored Rice Poori  
Jobstears Kheer  
Watermelon (Tarbooj) Kheer  
Yellow (Pumpkin) Kheer  
Sweet Potatoes Kheer  
Sweet Bread (Tutti Frutti)  
Sweets Carrots  
Sweet Water Melon rind  
Petha Mithai  
Moong Dal Halwa  
Boondi Ladoo  
Sago Kheer 
Rabdi/Rabri
                                            ---------------------------
Reproduction of the contents of this blog, without permission, in whole or part, is strictly prohibited.
Share
Tweet
Pin
Share
No comments
Newer Posts
Older Posts

About me

About Me


COOKING SPEAKS TO ALL MY SENSES

Follow Us

  • facebook
  • twitter
  • instagram
  • Google+
  • pinterest
  • youtube

Categories

recent posts

Sponsor

Facebook

Blog Archive

  • August 2018 (62)
  • July 2018 (4)
  • June 2018 (4)
  • May 2018 (3)
  • April 2018 (4)
  • March 2018 (4)
  • February 2018 (2)
  • January 2018 (3)
  • December 2017 (4)
  • November 2017 (3)
  • October 2017 (3)
  • September 2017 (4)
  • August 2017 (3)
  • July 2017 (5)
  • June 2017 (4)
  • May 2017 (2)
  • April 2017 (3)
  • March 2017 (3)
  • February 2017 (3)
  • January 2017 (4)
  • December 2016 (4)
  • November 2016 (4)
  • October 2016 (4)
  • September 2016 (5)
  • August 2016 (4)
  • July 2016 (3)
  • June 2016 (4)
  • May 2016 (3)
  • April 2016 (4)
  • March 2016 (4)
  • February 2016 (3)
  • January 2016 (4)
  • December 2015 (4)
  • November 2015 (5)
  • October 2015 (4)
  • September 2015 (4)
  • August 2015 (5)
  • July 2015 (1)
  • November 2014 (1)
  • July 2014 (2)
  • June 2014 (2)
  • May 2014 (2)
  • April 2014 (1)
  • March 2014 (2)
  • February 2014 (2)
  • January 2014 (5)
  • December 2013 (4)
  • November 2013 (2)
  • October 2013 (4)
  • September 2013 (2)
  • August 2013 (2)
  • July 2013 (4)
  • June 2013 (3)
  • May 2013 (4)
  • April 2013 (3)
  • March 2013 (4)
  • February 2013 (4)
  • January 2013 (4)
  • December 2012 (5)
  • November 2012 (3)
  • October 2012 (5)
  • September 2012 (6)
  • August 2012 (5)
  • July 2012 (4)
  • June 2012 (5)
Created with
Copyright © FUN COOKING