• HOME
  • ABOUT
  • CONTACT US
  • DISCLAIMER
  • SITEMAP
  • PRIVACY
facebook twitter instagram pinterest bloglovin Email

FUN COOKING

Find Good and Natural Recipes

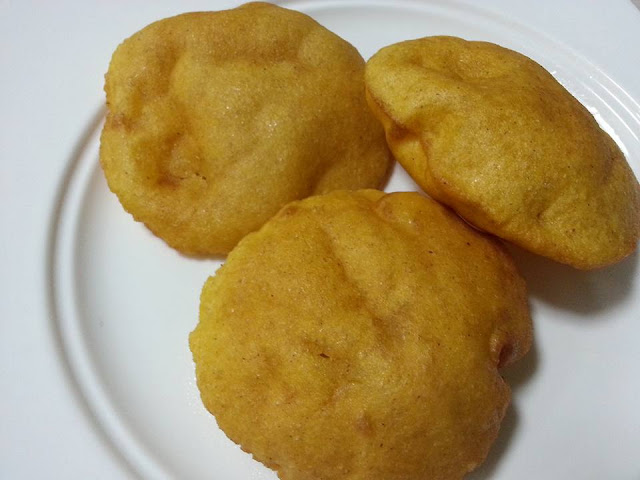
Fried Gorditas are made with corn flour in Mexico. It is quite similar to our poori.  The only difference is we can make it in advance and it remains fluffy all the time, even after many days. I made this in ladies kitty party, just microwaved 40 seconds in microwave before serving.  I served it with Rajma and imli water with onion flavor. Traditionally it is served as a sandwitch, which is filled with rajma paste, chutneys and salad. Here below is how we can make it:
Ingredients (12 pieces)
2.5 cups of makki ka aata
3/4 cups of all purpose flour
1 tbsp of baking powder
1/2 tsp of salt
1.5 cups of water
oil for deep frying
Ingredients for (55 pieces)
10 cups of makki ka aata
3 cups of maida/all purpose flour
4 tbsp of baking powder
3 tsp of salt
5 cups of water
Method
1. Sieve the makka+all purpose flour+baking powder and salt together through a sieve.
2.  Now make a dough with water.
3. Make 12 balls out of it.
4. Now place one dough ball between two wet plastic pieces and press it gently into round shape.
5.  Heat the oil in a frying pan.  Now fry the rolled gorditas in hot oil on medium flame. It should be puffed up.  One side atleast take 30 seconds.  One gorditas should be fried in 1 minute or little bit more.  Therefore adjust the heat accordingly.  Puffed gortditas remains in the same puffing position for many days.  It does not become flat after taking out of the oil.
6.  When it is done from both sides, take out from the oil.
Tips
1. When we place the rolled gordita in hot oil, there will be bubbling.  When bubbles settles, only then puff it gently with spatula.
2. Adjust the flame as one gordita should be fried in one minute.  Never fry in low flame, it will not fluff.
3.  Fry only one at a time.
Enjoy Healthy Cooking!!!
See more recipes:
Kuttu Flour Puda or Chilla       
Chili Chilla       
Spicy Grilled Baby Corn Kabab     
Namkeen Puda or Chilla       
Bread Tikki chaat     
Corn stuffed Mirch Pakoras       
Double Colored Rice Poori       
Kale Patra or Patoud     
Mathi or Mathiyan        
Papaya Parantha    
Kuttu &sweet Potato Roti       
Ajvaini Lacha Parantha     
Boiled Rice Parantha   
Bread Loaf     

Mooli Wali Makki roti   
Plain Makki Ki Roti       
 
sweet Bread (Tutti Frutti) 
Stale roti chilla  
Makki ka Plain Chilla
Dibba roti 
Yard long Beans Parantha
                                  -------------
Reproduction of the contents of this blog, without permission, in whole or in part, is strictly prohibited.
Share
Tweet
Pin
Share
No comments
'Burf wali kulfi  le lo' voice used to come in the afternoon in summer in our childhood. It is favorite of all children even we elders too. In my recent kitty party, I served it instead of juices.  Everyone loved it. Burf wali kulfi or frozen ice pops are very easy to make and even children can prepare it.  Here below is how we can make it:
Ingredients
Tipco orange juice or any other juice
few ice cream sticks
Popsicle mold
aluminum foil
wax paper
Method
1. Take any juice.  Here I have used Tipco orange juice or take out the juice form oranges.  Add sugar and little salt to it and mix well.
2.  Now pour the juice in Popsicle molds.
3. Cover it with aluminum foil. Now make a small cut with a knife, in which ice cream sticks can be inserted . Hole should be exact the same width of sticks otherwise it will not stand in the center.
4. Insert the ice cream sticks in the whole.
5. Keep the mold in freezer section of refrigerator for 8 hrs..
6. After that take out from the freeze. and keep the mold in water. burf kulfi will leave its side and it is the time to take out from the mould.
7. Tempting burf kulfi is ready to serve.
8.  If making for small parties, then place a wax paper in a plastic box and keep it on a small distance. Again put another wax paper on the ice pops and another batch of it can be kept on it.  In this way many layers of kulfis can be kept.. close the container and keep it in the freeze.  Take out only at serving time.
Enjoy Healthy Cooking!!!
See more recipes:
Somtam Papaya Salad   
Tom Yam Soup (veg.) 
Double Colored Rice Poori  
Jobstears Kheer  
Watermelon (Tarbooj) Kheer 
Yellow (Pumpkin) Kheer  
Sweet Potatoes Kheer  
Sweet Bread (Tutti Frutti)  
Sweets Carrots  
Sweet Water Melon rind 
 Petha Mithai 
Moong Dal Halwa 
Boondi Ladoo  
Sago Kheer
Rabdi/Rabri
                                       ----------------------
Reproduction of the contents of this blog without permission, in whole or in part is strictly prohibited.
Share
Tweet
Pin
Share
No comments
Peanut  is known as  singdana, mungfally, groundnuts and many other names in different languages. In India it is eaten in winter.  It is favorite time pass  of while sitting in sun, watching movie etc. etc.  It is used in many snacks and chaats. Today I am writing the recipe of its raita,  It is very delicious and easy to make with very few ingredients.  Here below is how we can make it:
Ingredients
2 cups of thick curd
handful of roasted peanuts
black salt to taste
handful of chopped cilantro
1/2 finely chopped green chili
1/2 tsp of sugar
1/4 tsp of roasted cumin powder
1/4 tsp of garam masala powder
pinch of black pepper powder
few mint leaves
Method
1. Spread the peanuts on paper towel in microwave. and roast it for 3 minutes. Now let it cool it completely.
2.  Remove the red and thin outer part of it by rubbing in both hands.
3.  Now crush it coarsely with the back of any bowl or glass.
4. Take the curd and sugar in a medium sized serving bowl and  make it smooth by whisking it for one minute.
5. Add peanuts, salt, garam masala, black pepper powder, cumin powder green chili, cilantro and hand torn mint leaves. Mix it well.
6. Peanuts raita is ready to serve,
Enjoy Healthy Cooking!!!
See more recipes:
Tamarind Paste    
Bread Tikki Chaat        
Chatpati Samak rice Chaat       
Chatpati Oats Chaat      
Sweet Potato Chaat       
Chatpati choley Chaat      
Dahi Bada Chaat        
Tamarind Fruit raita    
Loki raita    
 Brinjal Raita   
Pineapple Raita       
Bread Boondi Raita         
Jhatpat Dahi Bada chaat    
How to make roasted cumin powder      
Chatpati Tamarind Chutney    
Channa dal for Pakwans      
Pakwan  
Stale roti Chaat  
Dhokla Chaat 
Shakarkandi Dahi Chaat
                                        ---------------------------------
Reproduction of the contents of this blog, without permission, in whole or in part, is strictly, prohibited.
Share
Tweet
Pin
Share
No comments
Mathris are made in various flavours. Today I have made methi masala mathri.  It is very delicious and worth trying. Here below is in full details how to make it:
Ingredients
2 cups of all purpose flour/maida
salt to taste
1 tsp of ajvian
1 tsp of coarse black pepper
1/4 cup of oil for moyan
1/4 cup+2tbsp of water
handful of dried kasuri methi
1 tsp of cumin seeds
oil for frying
Method
1. Sieve the maida. Add salt, ajvain,cumin seeds, black pepper, and mix. 
2. Now add 1/4 cup of oil and mix it by rubbing with both hands.
3. Make a hard dough with 1/4 cup+2bsp of water.
5. Keep it rest for 10 minutes.
6. Now make it smooth with oily hands for few minutes.
7. Now make 25 small balls/pedis out of it. 
8. Roll it into small roundels. After that prick it with tooth prick or fork. 
9. Heat the oil in a frying pan on medium heat.
10. Fry all the masala mathris in hot oil on low to medium flame till golden brown.  It takes about 8 to 10 minutes. Take out from oil.
11. Crispy and flavorful methi mathris are ready to serve. 
Enjoy Healthy Cooking!!!
See more recipes:
Boondi Ladoo    
Plain Sawalee or Mathri    
Shakkar Paare or Khurma   
Petha Mithai  
Burfi of Left over Chashni of Petha Mithai   
Shakkar Paare or Khurma  
Sugar Coated phulia or Murmure   
Oats Burfi   
Chocolate Squares   
Sugar Coated Sawalee 
Besan Chakris/chaklis  
Pakwan  
Mathi 
Besan n Aate Ke Paare
                                   ----------------
Reproduction of the contents of this blog without permission, in whole or in part, is strictly prohibited.
Share
Tweet
Pin
Share
No comments
Rajmah is a very popular dish in greater pan-jab area. We can make many dishes with it. Rajmah chawal is very popular food which is served with tamarind water with onion on chaat stalls. It also goes well with chapati, tandoori roti, mexican fried gorditas and naan etc etc.  Here below is the whole process how I made it:
Ingredients (For 8 bowls/katoris)
250 grams/1.5 bowl dry rajmah
6.5 cups of water
1/2 tin of tomato paste(85 grams)
1 spoon of salt
1/2 tsp of turmeric powder
1 big onion
1 inch piece of grated ginger
pinch of asafetida
1 tsp of cumin seeds
2 tbsp of oil
1 finely chopped green chili
1/4 tsp of red chili powder
1/4 tsp of garam masala
handful of chopped cilantro
Method
1. Soak the rajmah with enough water overnight or atleast 5 to 6 hours.
2. Next wash it with fresh water. Now take the soaked rajma with salt, turmeric powder, asafetida and 6.5 cups of water. Pour one drop of oil and mix. Boil it in the pressure cooker.  As soon as first whistles comes, lower the heat to the minimum and let it cook for 30 minutes. Now remove from fire.  Open it when it gets cooled down completely.
3.  Now heat the 2 tbsp of oil in a frying pan.  Add cumin seeds.  Let it splutter till it stops itself.  Now add finely chopped or grated onion and ginger and cook it till translucent.
4.  Next add 1/2 tin of tomato paste or finely chopped 4 tomatoes. Cook it till it starts separating oil.
5.  Now add this to the boiled rajmah.
6.  Now again keep the pressure cooker of boiled rajmah on the fire. Cook it till desired consistency and remove from fire.
7. Add garam masala and handful of chopped cilantro.
8. Transfer it into serving bowl.  Delicious rajmah is ready to serve,
Enjoy Healthy Cooking!!!
See more recipes:
Palak Paneer    
Tori Peels Paneer Saag    
Bottle Gourd Zest Kofta Curry   
Bhiss(lotus stem) & Aaloo Sabji    
Leafy Potatoes (wild sweet leaves)    
Tiny Pumpkin with Spring Onion leaves    
Guava Sabji Kachalu Dahi (curd) Wale    
Baigan (brinjal) Bhurta    
Stuffed capsicum with Potato    
Potatoes with Spinach Chutney   
Stuffed Green chili Peppers (peanuts)  
Mint Paneer Pasanda   
Bhindi Sabzi in Microwave   
Stuffed Karela with cabbage   
Stuffed Parwal/Parval   
Milky Corn Methi Paneer 
Bhutte Ki Bhurzee/Bhurtha
Onion Stuffed simla Mirch
Stuffed tori 
Tamarind water with onion 
                                                -------------------
Reproduction of the contents of this blog without permission in whole or in part, is strictly prohibited.
Share
Tweet
Pin
Share
No comments
Newer Posts
Older Posts

About me

About Me


COOKING SPEAKS TO ALL MY SENSES

Follow Us

  • facebook
  • twitter
  • instagram
  • Google+
  • pinterest
  • youtube

Categories

recent posts

Sponsor

Facebook

Blog Archive

  • August 2018 (62)
  • July 2018 (4)
  • June 2018 (4)
  • May 2018 (3)
  • April 2018 (4)
  • March 2018 (4)
  • February 2018 (2)
  • January 2018 (3)
  • December 2017 (4)
  • November 2017 (3)
  • October 2017 (3)
  • September 2017 (4)
  • August 2017 (3)
  • July 2017 (5)
  • June 2017 (4)
  • May 2017 (2)
  • April 2017 (3)
  • March 2017 (3)
  • February 2017 (3)
  • January 2017 (4)
  • December 2016 (4)
  • November 2016 (4)
  • October 2016 (4)
  • September 2016 (5)
  • August 2016 (4)
  • July 2016 (3)
  • June 2016 (4)
  • May 2016 (3)
  • April 2016 (4)
  • March 2016 (4)
  • February 2016 (3)
  • January 2016 (4)
  • December 2015 (4)
  • November 2015 (5)
  • October 2015 (4)
  • September 2015 (4)
  • August 2015 (5)
  • July 2015 (1)
  • November 2014 (1)
  • July 2014 (2)
  • June 2014 (2)
  • May 2014 (2)
  • April 2014 (1)
  • March 2014 (2)
  • February 2014 (2)
  • January 2014 (5)
  • December 2013 (4)
  • November 2013 (2)
  • October 2013 (4)
  • September 2013 (2)
  • August 2013 (2)
  • July 2013 (4)
  • June 2013 (3)
  • May 2013 (4)
  • April 2013 (3)
  • March 2013 (4)
  • February 2013 (4)
  • January 2013 (4)
  • December 2012 (5)
  • November 2012 (3)
  • October 2012 (5)
  • September 2012 (6)
  • August 2012 (5)
  • July 2012 (4)
  • June 2012 (5)
Created with
Copyright © FUN COOKING