• HOME
  • ABOUT
  • CONTACT US
  • DISCLAIMER
  • SITEMAP
  • PRIVACY
facebook twitter instagram pinterest bloglovin Email

FUN COOKING

Find Good and Natural Recipes

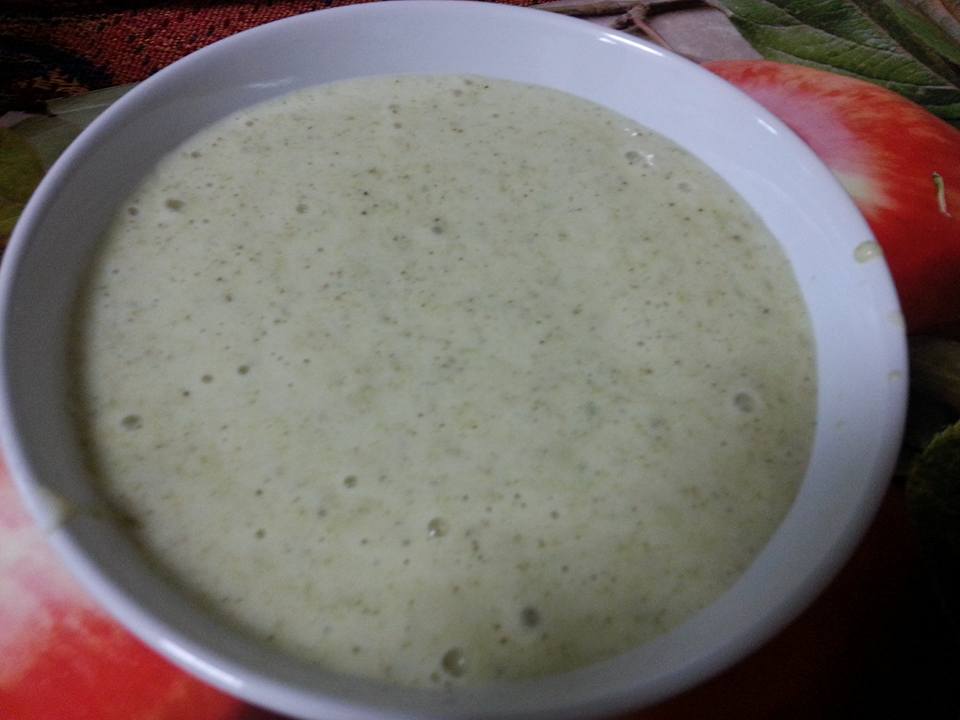
Broccoli sauce is very creamy delicious sauce which can be used as dip and in making many dishes.  It is very simple and easy to make. Here below is its full recipe:
Ingredients
Handful of broccoli florets
1 big boiled potato
1 green chili
1 cup of milk
salt to taste
1/4 tsp of black pepper
Method
1.  Wash and cut broccoli  in florets.  Now blanch in boiling water for 5 minutes.
2.  Drain the water.
3.  Boil the potato and get it cooled completely.
4.  Now take green chili, broccoli, potato , salt, black pepper, and milk in big jar of mixer and blend it in smooth texture.
5. Delicious creamy textured broccoli sauce is ready.
6. Transfer it to a bowl and use it as required.
Enjoy Healthy Cooking!!!
See more recipes:
How to steam corns in microwave    
Healthy Bhutta or Corn    
Palak (Spinach) Chutney      
Marua ( Sweet Basil) chutney      
Sweet and Sour Guava dip      
Cabbage & Papaya Seeds chutney      
Cucumber Peels Chutney      
Leftover Lemon Zest Jam or chutney      
Instant Pineapple Dip      
Tori Peels Chutney      
Hummus     
chatpate Orange Peels      
Ripe Banana Chutney  
Kairi chutney  
Red chutney   
 
Coconut Malai chutney  
Sandesh/Paneer Peda   
 
Moong Dal Kachori   
Peas Chutney 
Kaju chutney
Podina Payaji chutney 
                                        ----------------
Reproduction of the contents of this blog, without permission, in whole or in part is, strictly prohibited.
Share
Tweet
Pin
Share
No comments
Momos/dimsum/wanton is a very healthy snack.  It is made in Nepal, Bhutan and china etc. It has become street food in India. It is eaten steamed or fried with very spicy chutney.  Here below is its full recipe:
Ingredients
2 cups of all purpose flour/maida
1/2 tsp of salt
2/3 cup of water
4 cups of finely chopped cabbage
1.5 cups of grated pumpkin or carrot
1 cup finely chopped green onion leaves
1 finely chopped onion
1 tsp of grated ginger
1/2 cup of finely chopped cilantro
1/2 cup of grated cottage cheese or tofu (optional)
1 tsp of sugar salt to taste
1 tsp of light soy sauce
1 tsp of dark soy sauce
1 tsp of black pepper powder
2 tbsp of oil
Method
1. Take maida/All Perpose Flour and salt in a  big bowl.  Make a soft dough with 2/3 cup of water.  This much water is sufficient for 2 cups of maida. Smooth it with little bit or generously greasy hands.  Now keep it rest for 10 minutes covering with wet cloth.  On wet cloth
2.  Finely chop the cabbage in vegetable chopper.  Grate the pumpkin or carrot. Finely chop the spring onion leaves with knife. Spring onion white bulb and onion can be chopped in chopper too.
3.  Take the chopped cabbage, ginger and pumpkin/carrot in a cloth and squeeze out all the water from it.

4.  Take 2 tbsp of oil in a frying pan. Add onion and cook it for few minutes till translucent. After that add cabbage and pumpkin or carrot. Next add salt, sugar, black pepper powder and both the soy sauces and stir well. Flame should be high. Dry the water while stirring. Remove from heat.  Now add green onion leaves and cilantro and mix. Stuffing is ready.
5. Divide the dough into 25 pieces.  If making bite size, then divide it into 45 to 50 pieces.  Now make the balls out of it by rounding between both the palms.
6.  Now roll one ball and stuff the 1.5 spoons of vegetables while making its pleats. Make it any shape. Roll and stuff all the dough balls like wise. 
7.  Next boil the water in rice cooker or any other pot.  Put the momos/ dimsum on a greased steam basket with little distance.  Keep it on the boiling water in rice cooker and close the lid.
8.  Steam it for 6-7 minutes till transparent. After steaming let it cool completely so that we can fry it.
9. Heat oil in a frying pan/karahi.  Fry all the steam momos in medium hot oil.
10. Fried momos/dimsum are ready to serve. These are served very hot.
Tips
1. Vegetables can be used of one's choice.  Generally cabbage and carrot are used.  But here I have used pumpkin. 
2. It can be steamed in any pot  e.g pressure cooker, rice cooker steamer etc.  Here I have steamed in steam basket on rice cooker.  It can be kept on momos plate on a rack.  Momos plate is a plate with holes.
3.  If making it in advance, Keep it in a tray and cover it with slightly wet cloth then wrap the tray with cling film. Then cover with any other big tray. Keep it in the refrigerator.  Fry in medium hot oil till crisp.
Enjoy Healthy cooking!!!
See more recipes:
Bread Tikki chaat      
Kale crunchy Chips     
Betel Leaf Pakora     
Mathi or Mathiyan      
Spicy Samak Rice Idlis       
Jobstears Sour Idlis (Glutten free)   
Fried Jobstears   
Ripe Banana Peels Pakore     
Ajvain Leaves(ornamental) Pakore    
Oats Pakore     
Corn Stuffed MIrch Pakora    
Leftover Rice Tikki
Besan Chakris/chaklis 
Pakwan 
Mathi 

Besan Papdi 
Moong Dal Kachori 
Maida Dhokla 
Rice Flour tikki 
Besan n Aate Ke Paare 
Ginger and Mint Leaves Mathiyan 
Turn Cornmeal 
                                      -----------------------
Reproduction of the contents of this blog, without permission, in whole or in part, is strictly prohibited.
Share
Tweet
Pin
Share
No comments
Snake gourd is also known as Chinese cucumber, chichinda, serpent gourd and padwal etc. Earlier I have written the recipe of its raita.Today I have made its stuffed sabzi. Here below is its full details: 

 Ingredients
250 grams of snake gourd
1 big grated onion
2 tbsp of grated ginger
salt to taste
1 tsp of turmeric powder
1 tbsp of coriander powder
1 tbsp of fennel seeds powder
1 tsp of mango powder/imli paste
1 tsp of red chili powder
1/2 tsp of garam masala
2 tbsp of oil
Method
1. Wash, and peel the snake gourds.  Here I have taken very raw.
2. Cut it lengthwise in the middle of it in the way that its lower part should remain as intact so that it can be stuffed.  Now cut it into three pieces or as long as you require.
3.  Peel the onion and ginger and grate it coarsely.  Mix all the dry spices.  Now the filling mixture is ready.
 4.  Now stuff the onion masala in the snake gourd with the help of knife and handle of spoon.
5.  Put the oil in frying pan. Keep it on the low heat.  Now place all the stuffed pieces in the oil. Close the lid and place one bowl of water on the lid. Keeping the water bowl like this, prevents the sabzi from burning.
6.  After few minutes turn the snake gourds to the other side.
7.  Close the lid and keep the water bowl again on it.
8.  Cook it till it is soft.
9. Now take out all the cooked snake gourds in a plate and in the remaining oil put all the remaining onion masala and fry it on very low flame when it is done, again put all the sabzi in the masala.
11.  Now mix it with very light hand so that all the masala stick to the vegetable.
12.  Again cook it for 2 minutes without lid.
13.  Delicious stuffed snake gourds are ready to enjoy.
Enjoy Healthy Cooking!!!
See these recipes too:
Palak Paneer  
Tori Peels Paneer Saag  
 Bottle Gourd Zest Kofta Curry  
Bhiss(lotus stem) & Aaloo Sabji  
Leafy Potatoes (wild sweet leaves)  
Tiny Pumpkin with Spring Onion leaves  
Guava Sabji 
Kachalu Dahi (curd) Wale  
Baigan (brinjal) Bhurta  
Stuffed capsicum with Potato  
Potatoes with Spinach Chutney  
Stuffed Green chili Peppers (peanuts) 
Mint Paneer Pasanda  
Bhindi Sabzi in Microwave  
Stuffed Karela with cabbage
                                           ----------------------
All rights are reserved.
Reproduction of the contents of this blog, without permission, in whole or in part , is strictly prohibited.
Share
Tweet
Pin
Share
No comments
Raita is an Indian side dish of yogurt  and it is made with various vegetables and leaves.  Here below I am writing the recipe of kathal/jackfruit raita.: 
Ingredients
1/2 cup of  jack-fruit pulp
2 cups of curd
1 tbsp of chopped mint leaves
1 tsp of chopped mint leaves
1/2 tsp of sugar
¼ tsp of finely chopped green chili
½ tsp of garam masala
½ tsp of roasted cumin powder
1/4 tsp of black pepper powder
½ tsp of cumin seeds
Pinch of heeng
Salt to taste
½ tsp of oil
Method
1. 1.  Smear oil on hands and knife.This step is very necessary to tackle the problem of latex or sticky  and milky substance.
2.  Take the raw jack fruit which is available in the market for making sabzi etc. Peel it and cut into pieces.  While cutting,  peel its seeds too with knife.  If it is tender then no need to peel it.
3.  Now take this kathal into pressure cooker with 1/4 cup of water and little salt. I boiled it in hawkins pressure cooker.  When it comes on full pressure and first whistle comes, keep the flame on sim for1 minute.  Now remove from heat. We need completely cool boiled kathal. When it gets cooled, mash it with the back of big spoon.
4. After that beat the curd in a big bowl. Add kathal pulp, chopped mint leaves, sugar, mint leaves, green chili, and salt.  Mix properly.
If oil free is making then add cumin seeds poder and garam masala and mix.  Oil free kathal raita is ready.  Next steps written below is with little bit oil. That is completely optional
5.  Heat the oil in a ladle. Add hing and cumin seeds .  Let it crackle till it stops itself. Add this to the raita.
6. Now add garam masala and cumin powder.
7.  Kathal raita is ready to serve.
Enjoy Healthy Cooking!!!
See more recipes:
Baigan (brinjal) Bhurta
How to Roast Brinjals in Microwave
How to Make Cumin Powder  
Pakodi/Fulki        
Tamarind Paste        
Boiling Bamboo Shoots     
How to Roast Brinjals in OTG         
How to Roast Green Banana      
How to Microwave Raw Banana          
Tahini       
How to Roast Jobstears 
Healthy Bhutta or Corn         
 
Roasted Pumpkin Seeds         
How to roast Brinjals (Baingans)         
Roasted n Salted Soyabeans       
Roux Water or Lewi    
Leftover Rice Tikki     
Boiled rice Parantha       
Baked Brown Rice Pulav 
Khoya/Mawa  
Moong Beans Sprouts 
Tamarind Fruit raita      
Loki raita     
Brinjal Raita    
Pineapple Raita      
Bread Boondi Raita       
Jhatpat Dahi Bada chaat      
Petha Mithai
 
                                            -----------------                                  
All rights reserved.
Reproduction of the contents of this blog without permission, in whole or in part is prohibited.

Share
Tweet
Pin
Share
No comments
Shahtut/shahtoot/mulberry is a juicy fruit with sweet and sour taste while fully ripe shatoot is very sweet in taste. Here below is how I made its milk shake:
Ingredients
20 -25 mulberries
4 tsp of sugar
2 cups of milk
Method
1.  First of all wash the mulberries with fresh water. Break its stem.  
2.  Take the mulberries, is cup of milk and sugar in mixer's container.  Blend it for a minute.
3.  Now add  remaining milk and blend it again for a second or pulse it once.
4.  Delicious pinkish or purplish shahtoot milk shake is ready.  Transfer it into glasses.  Put ice cubes if required and serve. Adding ice cubes is optional.
Enjoy Healthy cooking!!!
See more recipes: 
Pineapple Juice          
Jobstears Sattu drink        
Bread Milk shake      
Refreshing Papaya Juice        
Spinach Lassi      
Lychee Juice   
Lemon Sharbat or squash         
 
Orange Sharbat        
Paan Lemonade  Kanji    
Lychee Squash or Sharbat  
Kacchi Lassi    
Black Grapes Lassi  
LOquat Drink  
Passion fruit Juice
Kale Patra 
Kale crunchy Chips 
Moringa Leaves Lassi 
                                               ---------------
Reproduction of the contents of this blog, without permission, in whole or in part is strictly prohibited.

Share
Tweet
Pin
Share
No comments
Newer Posts
Older Posts

About me

About Me


COOKING SPEAKS TO ALL MY SENSES

Follow Us

  • facebook
  • twitter
  • instagram
  • Google+
  • pinterest
  • youtube

Categories

recent posts

Sponsor

Facebook

Blog Archive

  • August 2018 (62)
  • July 2018 (4)
  • June 2018 (4)
  • May 2018 (3)
  • April 2018 (4)
  • March 2018 (4)
  • February 2018 (2)
  • January 2018 (3)
  • December 2017 (4)
  • November 2017 (3)
  • October 2017 (3)
  • September 2017 (4)
  • August 2017 (3)
  • July 2017 (5)
  • June 2017 (4)
  • May 2017 (2)
  • April 2017 (3)
  • March 2017 (3)
  • February 2017 (3)
  • January 2017 (4)
  • December 2016 (4)
  • November 2016 (4)
  • October 2016 (4)
  • September 2016 (5)
  • August 2016 (4)
  • July 2016 (3)
  • June 2016 (4)
  • May 2016 (3)
  • April 2016 (4)
  • March 2016 (4)
  • February 2016 (3)
  • January 2016 (4)
  • December 2015 (4)
  • November 2015 (5)
  • October 2015 (4)
  • September 2015 (4)
  • August 2015 (5)
  • July 2015 (1)
  • November 2014 (1)
  • July 2014 (2)
  • June 2014 (2)
  • May 2014 (2)
  • April 2014 (1)
  • March 2014 (2)
  • February 2014 (2)
  • January 2014 (5)
  • December 2013 (4)
  • November 2013 (2)
  • October 2013 (4)
  • September 2013 (2)
  • August 2013 (2)
  • July 2013 (4)
  • June 2013 (3)
  • May 2013 (4)
  • April 2013 (3)
  • March 2013 (4)
  • February 2013 (4)
  • January 2013 (4)
  • December 2012 (5)
  • November 2012 (3)
  • October 2012 (5)
  • September 2012 (6)
  • August 2012 (5)
  • July 2012 (4)
  • June 2012 (5)
Created with
Copyright © FUN COOKING